
Listen to the sound of a structural failure that tastes like victory. It is the rhythmic, glass-like shatter of Crispy Salmon Skin under the edge of a serrated blade. We are not merely cooking a protein; we are conducting a high-stakes engineering project involving the thermal rendering of subcutaneous lipids. When you approach the stovetop, you are the lead auditor of a complex chemical reaction. The goal is the total transformation of a wet, collagen-heavy membrane into a rigid, golden lattice of umami. Most home cooks treat the skin as a byproduct or, worse, a soggy afterthought. That ends today. We are looking for the perfect Maillard reaction, a process where amino acids and reducing sugars dance in a high-heat environment to create a savory crust that rivals the finest chicharron. This is about precision. This is about the physics of moisture evaporation and the alchemy of omega-3 oils. If you want a flabby, grey piece of fish, go elsewhere. If you want a masterclass in structural integrity and sensory dominance, grab your apron.
THE DATA MATRIX
| Metric | Specification |
|---|---|
| Prep Time | 15 Minutes |
| Execution Time | 8 Minutes |
| Yield | 2 Servings |
| Complexity (1-10) | 7 |
| Estimated Cost per Serving | $9.50 – $14.00 |
THE GATHERS
Ingredient Protocol:
- 2 Center-cut Salmon Fillets (340g / 12oz)
- Kosher Salt (10g / 2 tsp)
- Neutral High-Smoke Point Oil (30ml / 2 tbsp)
- Unsalted Butter (28g / 2 tbsp)
- Fresh Thyme Sprigs (2g / 3 sprigs)
- Lemon Zest (1g / 1 tsp)
Section A: Ingredient Quality Audit:
The primary failure point in this infrastructure is residual moisture. If your fish arrives in a vacuum-sealed bag sitting in its own purge, the cellular structure is likely compromised. To fix this, you must perform a dry-brine intervention. Salt the skin side heavily and leave it uncovered in the refrigerator for at least four hours. This uses osmosis to draw out deep-seated water that would otherwise steam the skin from the inside out. Furthermore, ensure your oil is not a low-quality blend. Use avocado or grapeseed oil to prevent premature smoking and acrid flavors. If the scales were not properly removed by the fishmonger, use the back of a knife to scrape against the grain until the surface is smooth.
THE MASTERCLASS
1. The Desiccation Protocol
The first step is a mandatory moisture audit. Use a heavy-duty paper towel to press firmly against the skin until the paper comes away bone dry. Even a microscopic layer of water will act as a thermal barrier, preventing the oil from reaching the necessary temperature for the Maillard reaction. Use a bench scraper to squeegee any remaining moisture from the surface.
Pro Tip: The science here is simple; water evaporates at 212 degrees Fahrenheit, but browning occurs above 300 degrees. You cannot reach browning temperatures until every drop of surface water is gone.
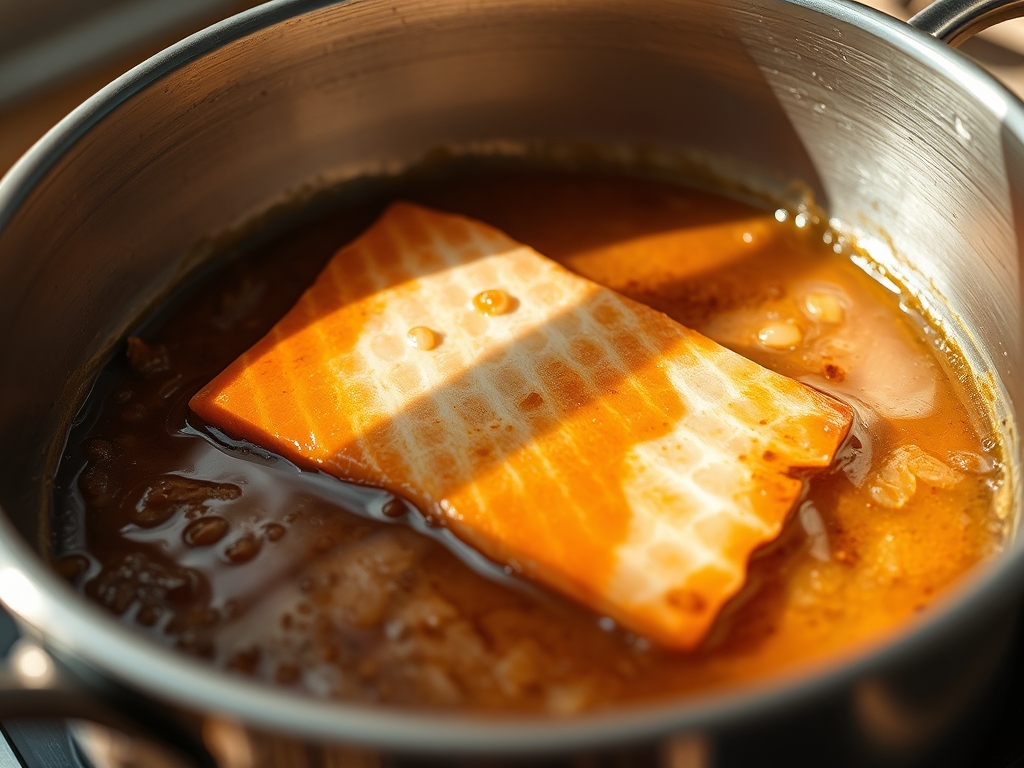
2. The Cold-Start Calibration
Place your pan on the burner but do not crank the heat to maximum immediately. Add your oil and place the fish skin-side down into a cold or lukewarm pan. This allows the fat to render slowly as the temperature rises. Use a digital scale to ensure your fillets are of equal weight for uniform heat distribution.
Pro Tip: Starting in a cold pan prevents the protein fibers from seizing up instantly. This minimizes the "curl" effect where the edges of the fish lift away from the heat source.
3. The Structural Compression
As the heat increases, the fish will naturally attempt to bow. Use a flexible fish spatula to apply firm, even pressure to the flesh side for the first 60 seconds of searing. This forces the skin to maintain 100% contact with the hot metal surface of your saucier or cast iron skillet.
Pro Tip: This physical compression ensures that the heat transfer is conductive rather than convective. It creates a flat, even plane of crunch rather than localized burnt spots.
4. The Lipid Infusion
Once the skin is rigid and golden, reduce the heat and add your butter and thyme. As the butter foams, tilt the pan and use a large spoon to infuse the hot fat over the flesh side of the fish. This is known as basing, and it cooks the top of the fillet gently while the skin continues to crisp.
Pro Tip: Butter contains milk solids that will toast and provide a nutty aroma. This adds a secondary layer of flavor complexity that oil alone cannot achieve.
Section B: Prep & Timing Fault-Lines:
The most common human error is "pan-panic," which is the urge to move the fish too early. If the skin is sticking to the pan, the chemical bond has not yet broken. Wait for the protein to naturally release. Another fault-line is the "over-flip." You should only flip the fish once. If you flip it multiple times, you lose the thermal momentum required to keep the skin dry, resulting in a greasy, rubbery texture. Use an infrared thermometer to ensure your pan stays between 375 and 400 degrees Fahrenheit.
THE VISUAL SPECTRUM
Section C: Thermal & Visual Troubleshooting:
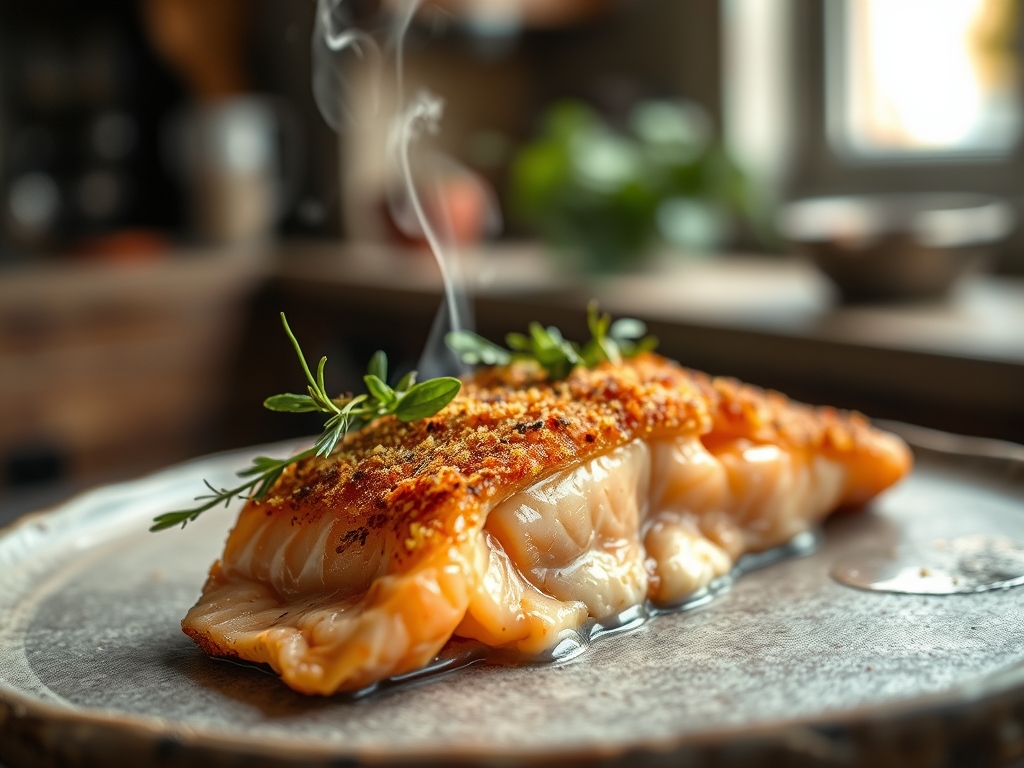
Referencing the Masterclass photo, you are looking for a deep mahogany hue with visible aeration in the skin layers. If your skin looks pale or translucent, your heat was too low; the collagen did not denature and instead turned into a gummy gel. If the skin is dark brown but the meat underneath is grey and chalky, your heat was too high, causing the exterior to burn before the interior reached safety. The visual cue for perfection is a "shatter-gap," a visible space between the crisp skin and the moist orange flesh. If the skin appears dull, it lacks a final viscous coating of fat; a quick baste with the pan juices will restore that professional sheen.
THE DEEP DIVE
Macro Nutrition Profile:
A single serving provides approximately 34g of high-quality protein and 22g of fat. The majority of this fat consists of heart-healthy Omega-3 fatty acids. While the skin is calorie-dense, it contains the highest concentration of collagen and vitamin D found in the animal.
Dietary Swaps:
- Vegan: Substitute the salmon with king oyster mushroom "scallops" scored in a crosshatch pattern to mimic the texture. Use vegan butter for the infusion.
- Keto/GF: This recipe is naturally keto-compliant and gluten-free. Ensure your salt does not contain anti-caking agents like cornstarch if you are hyper-strict.
Meal Prep & Reheating Science:
To maintain the molecular structure, never reheat salmon in a microwave. The steam generated will instantly hydrate the skin, turning it into a soggy mess. Instead, use an air fryer at 350 degrees for 3 minutes or a dry pan over medium heat to re-crisp the base without overcooking the center.
THE KITCHEN TABLE
Why is my salmon skin always rubbery?
You likely skipped the desiccation phase. Any surface moisture creates steam, which acts as an insulator against the heat. Use a knife to scrape the skin dry and ensure the pan is sufficiently hot before the fat begins to smoke.
Can I use non-stick pans for this?
While possible, non-stick surfaces often lack the "grip" needed to develop a true crust. Stainless steel or cast iron provides better heat retention and promotes the Maillard reaction more effectively than PTFE coatings.
How do I stop the fish from smelling "fishy"?
Freshness is paramount, but a quick rinse in cold water followed by an immediate, thorough drying session removes surface lactobacilli. A splash of piquant lemon juice at the very end also neutralizes trimethylamine, the compound responsible for that scent.
Should I leave the scales on?
Absolutely not. Scales are essentially fingernails and will not soften. Ensure your fish is scaled properly by running a knife against the grain. If you feel resistance or see small clear discs, keep scraping until the surface is smooth.

