
Listen to the sound of a structural failure that tastes like heaven. It is the rhythmic, glass-shattering crack of a perfectly executed Crispy Duck Breast under the edge of a serrated blade. We are not merely cooking dinner; we are performing a high-stakes extraction of subcutaneous lipids to achieve a textural miracle. Most home cooks treat duck like a thick steak, but that is a fundamental error in architectural planning. A duck breast is a biological heat shield designed to insulate waterfowl against freezing temperatures. To master it, you must become a thermal engineer. You are managing a three-way conflict between the delicate, lean protein of the pectoral muscle, the dense insulation of the fat cap, and the exterior dermis. If you fail, you end up with a rubbery, grey slab of disappointment. If you succeed, you produce a mahogany-crusted masterpiece that defies the laws of moisture retention. Prepare your station. We are about to initiate a controlled rendering process that turns stubborn fat into liquid gold and skin into parchment-thin crystalline joy.
THE DATA MATRIX
| Metric | Specification |
|---|---|
| Prep Time | 20 Minutes (plus 4-hour air dry) |
| Execution Time | 25 Minutes |
| Yield | 2 Servings |
| Complexity | 7/10 |
| Estimated Cost per Serving | $12.00 – $15.00 |
THE GATHERS
Ingredient Protocol:
- 2 Large Moulard Duck Breasts (approx. 450g / 1 lb total)
- 15g / 1 tbsp Coarse Kosher Salt
- 5g / 1 tsp Freshly Cracked Black Peppercorns
- 2 Sprigs Fresh Thyme (approx. 4g)
- 2 Cloves Garlic, smashed (approx. 10g)
- 30ml / 2 tbsp High-Quality Balsamic Vinegar (for the deglaze)
- 60ml / 1/4 cup Chicken Bone Broth (for the viscous pan sauce)
Section A: Ingredient Quality Audit:
If your duck breast feels "spongy" or has a pale, watery hue, you are dealing with a bird that was likely frozen and thawed poorly. This excess moisture is the enemy of the Crispy Duck Breast. To fix this, use a bench scraper to firmly press any excess moisture out of the skin before scoring. If the fat layer is excessively thin (less than 5mm), reduce your rendering time by 20% to avoid overcooking the lean meat. Conversely, if the fat is over 1cm thick, you must score the skin in a tighter diamond pattern to increase the surface area for heat penetration.
THE MASTERCLASS
Step 1: The Cold Start Calibration
Place the duck breasts on a clean cutting board. Using a sharp utility knife, score the skin in a 5mm diamond pattern, being careful not to puncture the red flesh beneath. Place the breasts skin-side down in a cold stainless steel saucier or heavy-bottomed skillet. Turn the heat to medium-low.
Pro Tip: Starting in a cold pan allows the fat to render gradually before the skin proteins tighten. This prevents the fat from being "trapped" under a seared surface. A digital scale ensures your salt distribution is precisely 1% of the meat's weight for optimal seasoning.
Step 2: The Lipid Extraction Phase
As the pan heats, the fat will begin to liquefy. Use a spoon to periodically remove the liquid fat, leaving just a thin layer. This prevents the duck from deep-frying and ensures the skin stays in direct contact with the hot metal. Continue this for 12 to 15 minutes until the skin is thin and golden.
Pro Tip: Use a bench scraper to gently press the meat down if it begins to curl. This maintains a flat "thermal bridge" between the pan and the skin, ensuring an even, edge-to-edge mahogany crust.
Step 3: The Flip and Infusion
Once the skin is translucent and crisp, flip the breasts. Add the garlic and thyme to the pan. Cook the flesh side for only 3 to 5 minutes, or until an instant-read thermometer registers 52C (125F) for a perfect medium-rare.
Pro Tip: This is where you infuse the fat with aromatics. The garlic should dance in the remaining oil, releasing its piquant essence without burning. Professional chefs use a saucier because the curved sides promote better fat circulation during this stage.
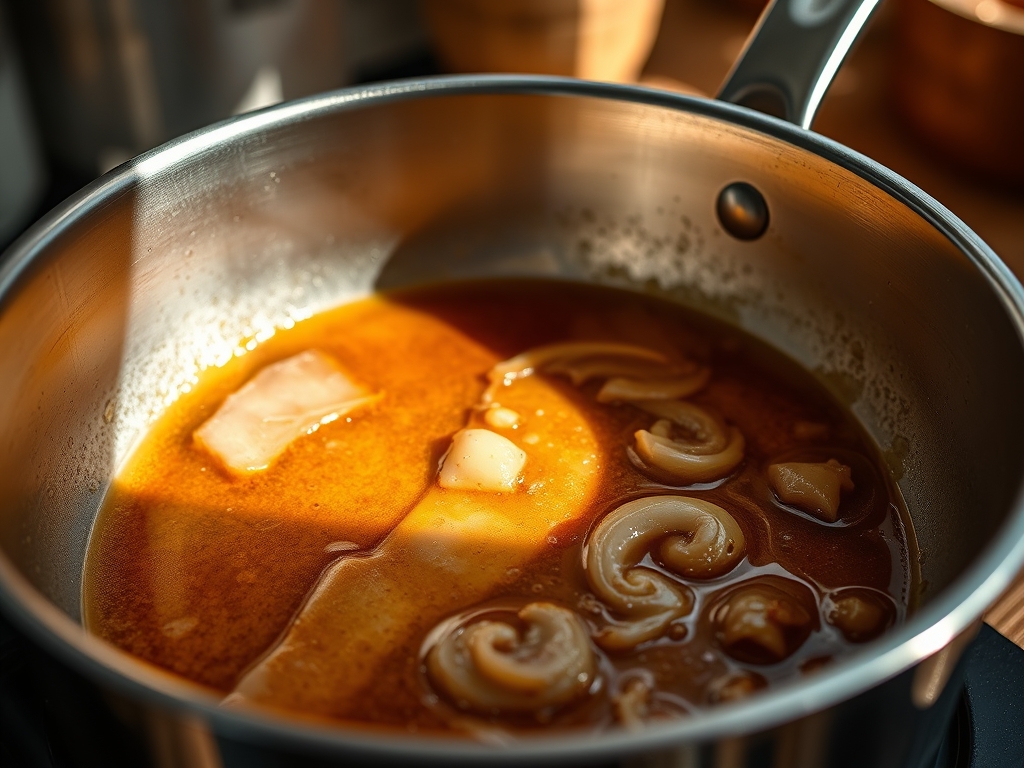
Step 4: The Deglaze and Rest
Remove the duck to a warm plate. Pour off the excess fat. Return the pan to the heat and add the balsamic vinegar and broth. Use a whisk to deglaze the browned bits (fond) from the bottom. Simmer until the sauce is viscous and coats the back of a spoon.
Pro Tip: Resting the meat for at least 8 minutes is non-negotiable. This allows the internal pressure to equalize, preventing the juices from flooding the plate when you slice into that Crispy Duck Breast.
Section B: Prep & Timing Fault-Lines:
The most common human error is "The Panic Flip." If you flip the duck too early because you fear the heat, the skin will remain flabby and viscous rather than crisp. If your kitchen starts smoking excessively, your heat is too high; the fat is hitting its smoke point before it can properly render. Lower the flame and move the pan off the burner for sixty seconds to reset the thermal equilibrium.
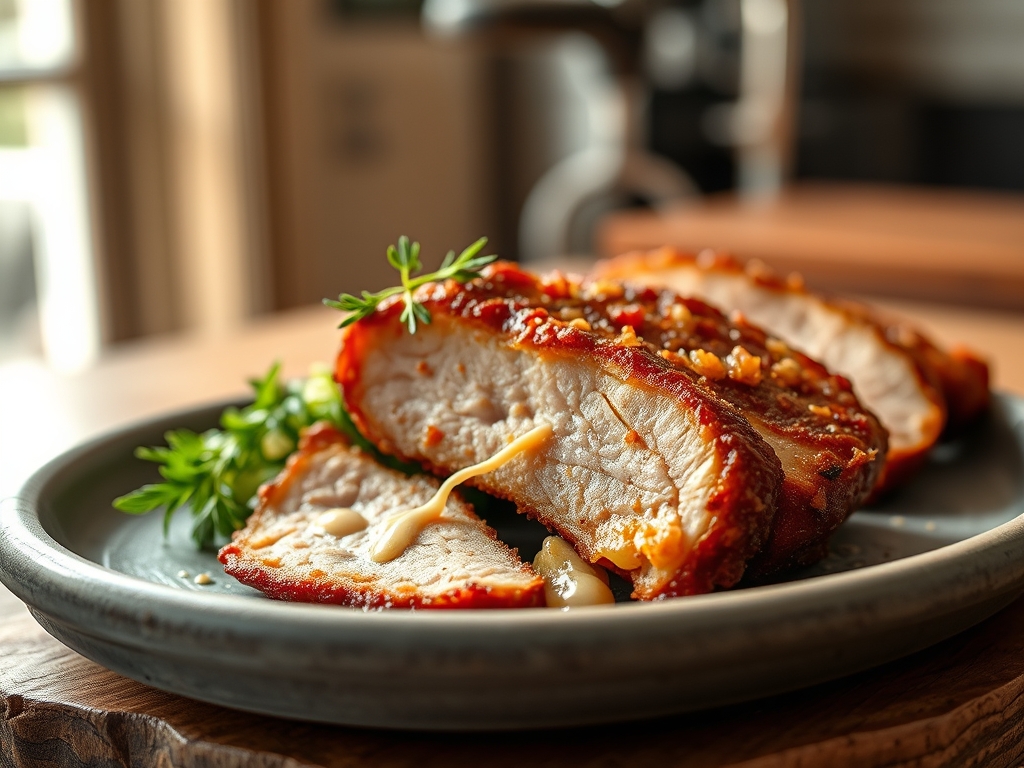
THE VISUAL SPECTRUM
Section C: Thermal & Visual Troubleshooting:
Referencing the Masterclass photo, your goal is a deep "burnt orange" to "mahogany" hue. If your skin looks "blonde" or pale, you did not allow enough time in the cold-start phase. If the edges are dark but the center is pale, your pan is warped or the duck was not pressed flat. To fix a dull appearance, aerate your pan sauce with a cold knob of butter at the very end; this creates a glossy sheen that reflects light beautifully on the plate. If the meat looks grey instead of pink, you bypassed the resting phase or overcooked the flip side.
THE DEEP DIVE
Macro Nutrition Profile
A standard serving of Crispy Duck Breast (approx. 150g) provides 35g of high-quality protein and 28g of fat. While high in lipids, the majority of the saturated fat is rendered out during the cooking process, leaving behind a profile rich in iron and selenium.
Dietary Swaps
- Vegan: Replace the duck with extra-firm tofu pressed for 24 hours. Score the surface and sear in mushroom oil to mimic the savory depth.
- Keto: This dish is naturally keto-compliant. Ensure your deglazing liquid is a dry red wine rather than balsamic vinegar to minimize sugar.
- GF: The recipe is naturally gluten-free; just ensure your bone broth has no hidden thickeners.
Meal Prep & Reheating Science
Reheating duck is a delicate operation. To maintain the molecular structure of the skin, never use a microwave. Instead, place the duck in a 175C (350F) oven for 5 minutes. This re-activates the fat within the skin cells, restoring the "crunch" without over-coagulating the proteins in the meat.
THE KITCHEN TABLE
Why is my duck skin still rubbery?
You likely skipped the cold-start or didn't score deep enough. The heat must reach the fat layer directly to render it. If the skin isn't paper-thin by the time you flip, it needs more time on low heat.
Can I save the leftover duck fat?
Absolutely. Filter it through a fine-mesh sieve and store it in the fridge. It is a stable, flavorful lipid perfect for roasting potatoes or searing vegetables. It has a high smoke point and incredible depth of flavor.
What is the best pan for this?
Stainless steel or cast iron is essential. Non-stick pans cannot handle the sustained dry heat required for a proper render and will not produce the necessary fond for a high-quality deglaze or pan sauce.
How do I get that perfect pink center?
Precision is key. Use a digital probe thermometer and pull the meat at 52C (125F). The carry-over heat during the resting phase will bring it to a perfect 57C (135F) for a medium-rare finish.

