
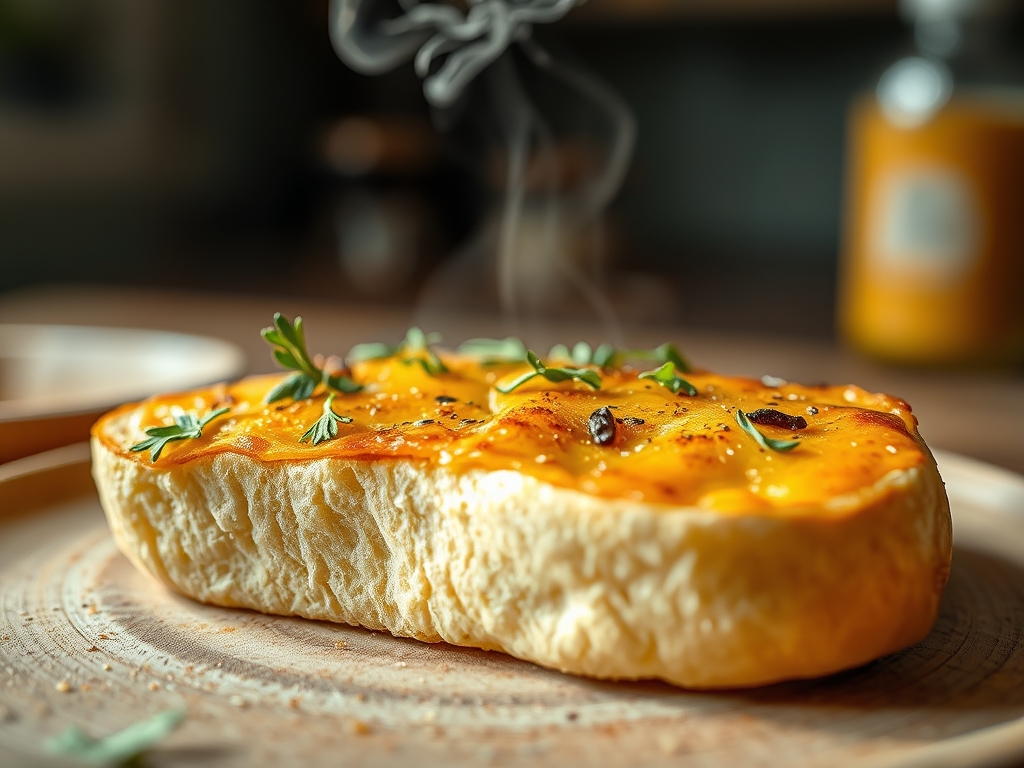
Forget the limp, flavorless loaves of the supermarket aisles; we are here to engineer a structural masterpiece of carbonation and grain. When the pull-tab cracks and the first wave of carbon dioxide escapes, you are not just opening a beverage; you are activating a pressurized leavening agent. The magic of the Beer Bread Surface lies in the violent interaction between residual sugars and the intense heat of a preheated oven. This is where the Maillard reaction stops being a culinary theory and becomes a crunchy, golden reality. We are looking for a rugged, craggy topography that looks like a lunar landscape forged in butter. This crust is the structural armor of the loaf, protecting a crumb that is dense yet tender, infused with the complex, fermented notes of hops and barley. If your crust does not shatter slightly under the serrated edge of a bread knife, you have failed the audit. We are seeking a viscous batter that transforms into a rustic monument of home-baked engineering. Put down the instant yeast; the bubbles are already in the bottle.
THE DATA MATRIX
| Metric | Specification |
|---|---|
| Prep Time | 10 Minutes |
| Execution Time | 50 to 60 Minutes |
| Yield | 1 Standard Loaf (approx. 8-10 slices) |
| Complexity (1-10) | 2 (Entry-Level Engineering) |
| Estimated Cost per Serving | $0.45 USD |
THE GATHERS
Ingredient Protocol:
- All-Purpose Flour: 375g / 3 cups
- Baking Powder: 15g / 1 tablespoon
- Fine Sea Salt: 6g / 1 teaspoon
- Granulated Sugar: 50g / 1/4 cup
- Cold Beer (Lager or Ale): 355ml / 12 ounces
- Unsalted Butter (Melted): 56g / 1/4 cup
- Optional: Dried Rosemary: 2g / 1 teaspoon
Section A: Ingredient Quality Audit:
The primary failure point in this protocol is expired chemical leaveners. If your baking powder has been sitting in the pantry since the last administration, your loaf will be a dense, leaden brick. Test it by dropping a pinch into hot water; if it does not aggressively aerate, discard it. Furthermore, the choice of fluid is paramount. A light lager provides a subtle, bready profile, while an oatmeal stout introduces deep cocoa and coffee notes. Avoid "skunked" beer or ultra-hoppy IPAs, as the boiling process concentrates alpha acids, which can render the final product unpleasantly bitter. Finally, ensure your flour is not packed down. Use a digital scale for precision; volume measurements are the enemy of consistency.
THE MASTERCLASS
1. Dry Component Integration
Sift your flour, baking powder, sugar, and salt into a large stainless steel mixing bowl. Sifting is not a suggestion; it is a requirement to prevent "flour pockets" and ensure the leavening agent is distributed evenly throughout the matrix.
Pro Tip: Use a fine-mesh sieve to aerate the flour. This increases the surface area for the beer to hydrate, preventing a gummy interior.
2. The Carbonation Infusion
Create a well in the center of the dry ingredients. Pour the entire 12-ounce bottle of beer into the center. Using a silicone spatula or a bench scraper, fold the ingredients together until just combined. Do not overwork the dough.
Pro Tip: Over-mixing develops gluten, which is the enemy of a rustic beer bread. You want a "shaggy" mass, not a smooth dough, to ensure the Beer Bread Surface remains craggy and crisp.
3. The Lipid Barrier
Transfer the batter into a greased 9×5 inch loaf pan. Level the top slightly with your spatula. Pour the melted butter directly over the top of the raw batter. This butter will fry the exterior of the dough as it bakes.
Pro Tip: Use a small saucier to melt the butter slowly. High-quality butter with a high fat content will render more effectively, creating a shatteringly crisp crust.
4. Thermal Execution
Slide the pan into an oven preheated to 375 degrees Fahrenheit (190 Celsius). Bake for 50 to 60 minutes. The loaf is done when a digital probe thermometer inserted into the center reads 200 degrees Fahrenheit.
Pro Tip: Rotate the pan 180 degrees halfway through the bake. This accounts for oven hot spots and ensures a uniform Beer Bread Surface coloration.
Section B: Prep & Timing Fault-Lines:
Temperature control is the most common human error. If the beer is ice-cold, it can slightly shock the melting butter, leading to uneven distribution. Aim for room temperature beer if possible. Additionally, the "oven spring" happens in the first ten minutes. If you open the oven door during this phase, you lose the pressurized heat required to infuse the crust with its signature crunch. Trust the timer and the glass window.
THE VISUAL SPECTRUM
Section C: Thermal & Visual Troubleshooting:
Look at the Masterclass photo: the Beer Bread Surface should exhibit a deep amber hue with "peaks" that are slightly darker than the "valleys." If your loaf is pale and soft, your oven calibration is likely low; increase the heat by 15 degrees. If the top is burnt but the center is raw, you likely placed the rack too high. The middle rack is the "Goldilocks zone" for convective heat. A dull, matte finish indicates you skimped on the butter. The butter is what provides the gloss and the crunch; it is non-negotiable for the technical audit.
THE DEEP DIVE
Macro Nutrition Profile:
A standard slice contains approximately 190 calories, 32g of carbohydrates, 5g of fat, and 3g of protein. The sugar content is necessary to feed the Maillard reaction, but it can be reduced by 25% if a more savory profile is desired.
Dietary Swaps:
- Vegan: Substitute the butter with a high-quality vegan margarine or coconut oil.
- Keto: This specific recipe is difficult to convert due to the reliance on wheat flour and beer sugars; however, almond flour and sparkling water can be used as a low-carb "mock" version.
- GF: Use a 1-to-1 gluten-free flour blend containing xanthan gum and ensure the beer is a certified gluten-free sorghum or rice-based brew.
Meal Prep & Reheating Science:
To maintain the molecular structure, do not store beer bread in plastic bags, as this traps moisture and turns the crust into a sponge. Store in a paper bag or a bread box. To reheat, avoid the microwave at all costs. Use a toaster oven or a standard oven at 350 degrees for five minutes to re-crisp the lipids on the surface.
THE KITCHEN TABLE
Why is my bread so bitter?
This is usually a result of using a high-IBU (International Bitterness Units) beer like a West Coast IPA. The boiling process intensifies hop bitterness. Stick to malty ales, lagers, or stouts for a more balanced, piquant flavor profile.
Can I add cheese to the batter?
Absolutely. Folding in 100g of sharp cheddar adds fat and protein, which enhances the browning of the Beer Bread Surface. Ensure the cheese is cubed small so it doesn't create large structural voids in the crumb.
My loaf didn't rise at all. What happened?
Check your baking powder. It is the sole lifting agent here. If the beer was flat (no carbonation), you also lost a significant portion of the mechanical aeration. Always use a fresh, highly carbonated beverage for maximum lift.
How do I get that specific "craggy" look?
Do not smooth the top of the batter. The more irregular the surface is when it enters the oven, the more "peaks" there are to catch the butter and brown. The crags are where the flavor lives.

