
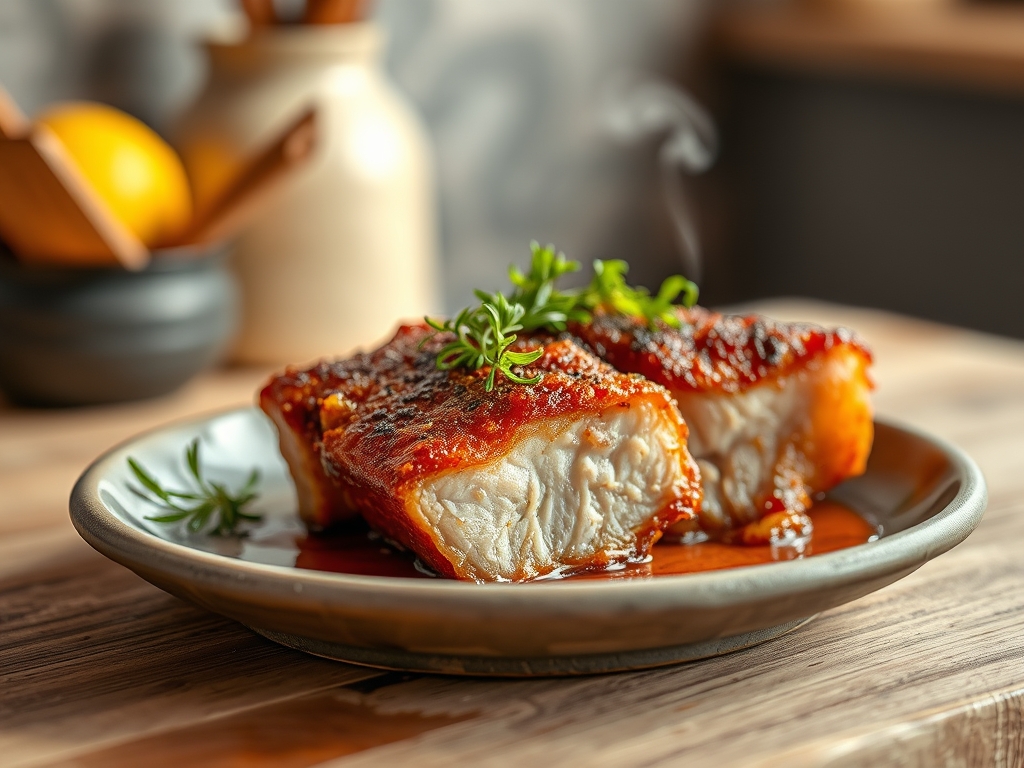
Listen closely because we are about to engage in the high-stakes engineering of the ultimate culinary structure. We are not just cooking dinner; we are performing a systematic extraction of moisture and a controlled expansion of cellular tissue. The subject of today's audit is Crispy Pork Belly. This is a dish defined by the violent contrast between a glass-like, aerated epidermis and a lush, melt-in-your-mouth lipid layer. If you have ever suffered through a slab of pork that felt like chewing on a rubber tire or a piece of leather, you are the victim of poor thermal management. We are here to rectify those structural failures. We want that specific sound; the audible crack that signals a successful Maillard reaction and the perfect rendering of subcutaneous fat. We are looking for a result so porcine and decadent that it borders on the obscene. Prepare your workstations. We are moving from raw biological matter to a masterpiece of crispy, salty, and savory architecture.
THE DATA MATRIX
| Metric | Specification |
|---|---|
| Prep Time | 24 Hours (Dehydration Phase) |
| Execution Time | 90 Minutes |
| Yield | 4-6 Servings |
| Complexity | 7/10 |
| Estimated Cost per Serving | $4.50 – $6.00 |
THE GATHERS
Ingredient Protocol:
- 1.5kg / 3.3lbs High-Quality Pork Belly (Skin-on)
- 30g / 2 tbsp Coarse Sea Salt
- 15ml / 1 tbsp Rice Vinegar
- 10g / 2 tsp Five Spice Powder
- 5g / 1 tsp White Pepper
- 20ml / 1.3 tbsp Shaoxing Wine
- 500g / 1.1lbs Rock Salt (for the salt crust)
Section A: Ingredient Quality Audit:
The most common failure point in Crispy Pork Belly is the starting material. If your pork belly arrives with a thin, uneven fat cap, the meat will dry out before the skin can aerate. Ensure your butcher provides a center-cut slab with distinct, alternating layers of muscle and fat. If the skin is already damp or "tacky" to the touch, it has been stored in a high-humidity environment. To fix this, wipe the surface with a paper towel soaked in high-proof alcohol to strip surface moisture and sanitize the pores. If the meat smells slightly "funky" but is within its use-by date, a quick rinse in cold water followed by a viscous rub of salt and vinegar will neutralize surface bacteria and brighten the flavor profile.
THE MASTERCLASS
Step 1: The Integumentary Perforation
Using a dedicated meat tenderizer or a bundle of sharpened bamboo skewers, prick thousands of tiny holes into the skin. Do not penetrate into the fat layer; stay within the epidermis.
Pro Tip: This creates exit channels for steam. If you do not create these pathways, the steam remains trapped, resulting in a rubbery texture rather than a shattered-glass crunch. Use a digital scale to ensure you are applying even pressure across the entire surface area.
Step 2: The Acidic Dehydration
Flip the meat and score the flesh side in a diamond pattern. Rub the Five Spice, pepper, and Shaoxing wine into the meat only. Wipe the skin side completely clean with rice vinegar.
Pro Tip: Vinegar acts as a chemical desiccant. By lowering the pH of the skin, you accelerate the breakdown of proteins, which allows for faster browning. Use a bench scraper to ensure no marinade has migrated to the skin surface.
Step 3: The Salt Encapsulation
Place the pork on a sheet of foil, folding the edges up to create a snug "box" around the sides of the meat, leaving only the skin exposed. Cover the skin with a 1cm thick layer of rock salt. Roast at 180C / 350F for 50 minutes.
Pro Tip: The rock salt acts as a thermal insulator and a moisture wick. It draws water out of the skin while protecting it from scorching during the initial render phase. A saucier is not needed here, but a reliable oven thermometer is mandatory.
Step 4: The High-Heat Expansion
Remove the salt crust entirely. Increase the oven temperature to 230C / 450F. Place the pork back in for 20 to 30 minutes until the skin puffs and blisters.
Pro Tip: This is the "popcorn effect." The remaining moisture in the skin turns to steam instantly, inflating the protein matrix. Monitor this phase visually to ensure the Maillard reaction does not cross over into carbonization.
Section B: Prep & Timing Fault-Lines:
The primary human error in this protocol is impatience. If you skip the 24-hour fridge dehydration step, the skin will never achieve maximum crispness. If your oven temperature fluctuates, use a pizza stone to add thermal mass and stabilize the environment. If the meat reaches its internal target temperature (75C / 167F) before the skin is crispy, remove the pork, let it rest, and then use a kitchen torch or a high-set broiler for the final 2 minutes of "puffing" to save the texture without overcooking the protein.
THE VISUAL SPECTRUM
Section C: Thermal & Visual Troubleshooting:
Referencing the Masterclass photo, you are looking for a "honeycomb" texture on the surface. If your pork looks smooth and dark brown rather than bubbly and golden, you did not prick enough holes or the salt crust was too damp. If the skin is charred in patches, your oven has "hot spots." Rotate the tray every 10 minutes during the high-heat phase. If the meat layers look grey instead of pinkish-white, you have over-rendered the fat; reduce your initial roasting time. The goal is a visual gradient: dark, seasoned meat at the bottom, a white fat layer in the middle, and a bright, aerated gold crust on top.
THE DEEP DIVE
Macro Nutrition Profile:
Crispy Pork Belly is a high-density energy source. A standard 150g serving contains approximately 450 calories, 35g of fat, 25g of protein, and 0g of carbohydrates. It is an ideal centerpiece for metabolic-focused diets.
Dietary Swaps:
- Vegan: Substitute with King Oyster mushrooms. Score the caps and roast with a miso-glaze to mimic the savory depth.
- Keto/GF: This recipe is naturally keto and gluten-free. Ensure your Shaoxing wine does not contain added wheat-based thickeners.
Meal Prep & Reheating Science:
To maintain the molecular integrity of the crunch, never reheat in a microwave. The electromagnetic waves vibrate water molecules, which will migrate into the skin and turn it into rubber. Instead, use an air fryer or a toaster oven at 200C / 400F for 5 minutes. This re-renders the surface fats and restores the structural rigidity of the skin.
THE KITCHEN TABLE
Why is my pork skin chewy?
The skin likely retained too much moisture. Ensure a 24-hour uncovered fridge dry and a thick salt crust during the first roast. Moisture is the absolute enemy of the crunch.
Can I use pork shoulder instead?
No. The shoulder lacks the specific stratified layers of fat and the thick epidermis required for this technique. Stick to the belly for the necessary subcutaneous lipid rendering.
What if the salt sticks to the skin?
This happens if the skin was wet before the salt was applied. Use a dry brush or a clean towel to vigorously remove the excess. Small amounts will dissolve during the final blast.
Is Shaoxing wine essential?
It provides a specific piquant acidity and aroma. If unavailable, dry sherry or a splash of extra rice vinegar mixed with a pinch of sugar is a functional substitute.
How do I get an even puff?
Level the pork. If the slab is lopsided, the high spots will burn while the low spots stay soft. Use crumpled foil under the meat to create a perfectly flat surface.

