
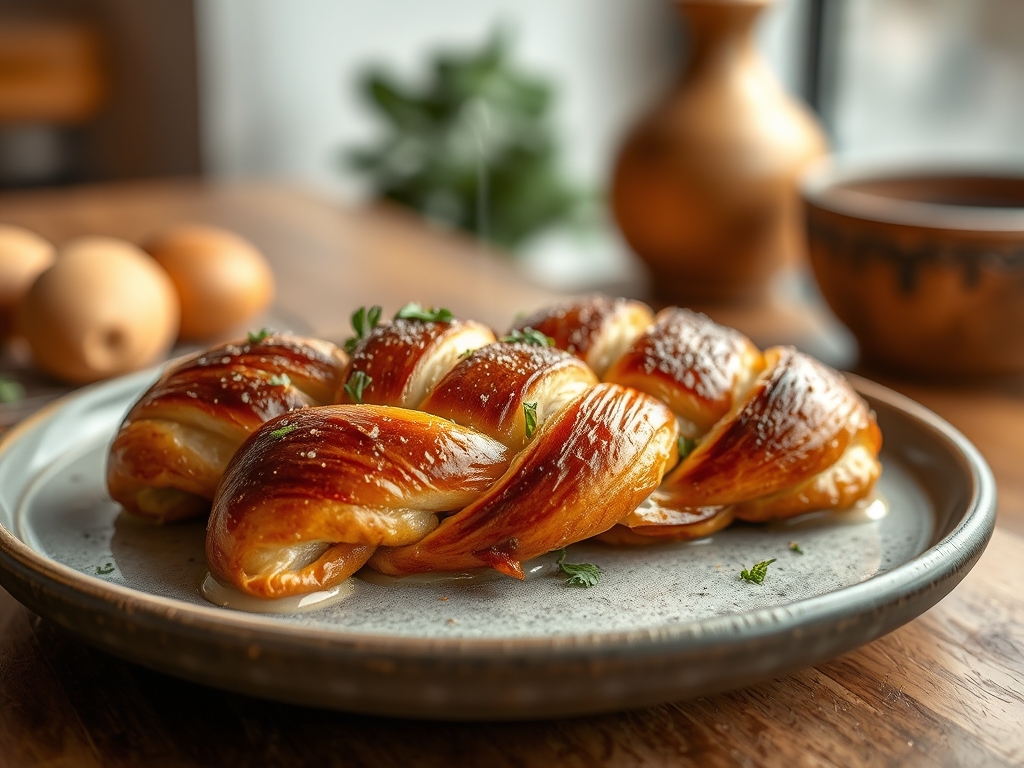
The scent of yeast hitting warm water is not just a kitchen occurrence; it is a seismic event in the world of structural baking. We are not merely making bread here. We are engineering a masterpiece of tension, elasticity, and Maillard-driven aesthetics. The Braided Challah Skin is the ultimate prize: a taut, mahogany-hued exterior that crackles ever so slightly before yielding to a cloud-like interior. This is where high-tensile dough meets the artistry of the egg wash. If your crust lacks that signature high-gloss sheen or if your braids are splitting like a poorly managed construction site, you have come to the right place. We are auditing your process from the molecular level up. We will discuss protein alignment, the refractive index of lipid-rich glazes, and the precise thermal window required to achieve that deep, amber glow. Put away your rolling pins and prepare your bench scrapers. We are building an edible infrastructure that demands respect, provides structural integrity, and tastes like a buttery, honey-infused dream.
THE DATA MATRIX
| Metric | Specification |
|---|---|
| Prep Time | 45 Minutes (Active) |
| Execution Time | 4 Hours (Including Proofing) |
| Yield | 2 Large Loaves |
| Complexity (1-10) | 7 (Advanced Tension Management) |
| Estimated Cost per Serving | $0.85 |
THE GATHERS
Ingredient Protocol:
- High-Protein Bread Flour: 1000g / 8 cups
- Warm Water (105F): 350ml / 1.5 cups
- Active Dry Yeast: 15g / 4.5 teaspoons
- Large Egg Yolks (for dough): 4 units
- Large Whole Eggs (for dough): 2 units
- Honey or Granulated Sugar: 100g / 0.5 cups
- Neutral Oil (Grapeseed or Canola): 120ml / 0.5 cups
- Fine Sea Salt: 18g / 1 tablespoon
- Egg Yolks (for glaze): 2 units
- Heavy Cream (for glaze): 15ml / 1 tablespoon
Section A: Ingredient Quality Audit:
If your flour has a protein content lower than 12 percent, your Braided Challah Skin will lack the structural fortitude to hold its shape during the secondary proof. The result is a sad, flat loaf. Fix this by adding 20g of vital wheat gluten to your dry mix. If your yeast fails to foam within ten minutes, it is biologically inactive. Dispose of it. Do not attempt to "wait it out." Furthermore, if you use cold eggs, you will shock the yeast and stall the fermentation. Always temper your eggs in a warm water bath for five minutes before incorporation to ensure the lipids emulsify seamlessly into the hydration phase.
THE MASTERCLASS
Step-by-Step Execution:
1. Hydration and Yeast Activation
Combine your warm water, honey, and yeast in the bowl of a stand mixer. Let it sit until a viscous foam forms on the surface. This is the "bloom" phase, indicating the yeast is ready to aerate the heavy dough.
Pro Tip: Use a digital thermometer to ensure the water is exactly 105F. Anything over 120F will terminate the yeast cells, while anything under 95F will fail to trigger optimal metabolic activity.
2. The Lipid Integration
Add your oil, whole eggs, and yolks to the yeast mixture. Whisk vigorously to infuse the fat into the liquid. Gradually add the flour and salt while using the dough hook attachment on low speed.
Pro Tip: Use a professional-grade saucier to slightly warm your honey before adding it; this lowers the viscosity and ensures it distributes evenly without leaving sugar hot-spots in the crumb.
3. Developing the Gluten Matrix
Knead the dough for 8 to 10 minutes until it passes the "windowpane test." The dough should be smooth, tacky but not sticky, and capable of being stretched thin enough to see light through it without tearing.
Pro Tip: Use a stainless steel bench scraper to clear the sides of the bowl. This ensures every gram of flour is hydrated and prevents "dry pockets" that cause structural fractures during the bake.
4. Primary Fermentation and Degassing
Place the dough in a lightly oiled bowl and cover with a damp cloth. Let it rise in a draft-free environment until doubled in size. Once risen, gently punch down the dough to render out excess carbon dioxide.
Pro Tip: Do not over-proof at this stage. If the dough smells overly acidic or "boozy," the yeast has exhausted its fuel supply, and the Braided Challah Skin will collapse in the oven.
5. Braiding for Structural Tension
Divide the dough into equal portions using a digital scale for precision. Roll into long, smooth strands. Braid tightly, tucking the ends underneath to create a seamless finish.
Pro Tip: Tension is the secret to a high-domed loaf. If the strands are too loose, the bread will expand outward rather than upward. Think of it as architectural cable-staying.
6. The Glazing Protocol
Whisk the remaining yolks and heavy cream. Apply a thin, even layer over the braided surface. Let the loaf proof for another 45 minutes, then apply a second coat of glaze immediately before baking.
Pro Tip: This double-glazing technique creates a multi-layered protein shield. As the water evaporates, the proteins and fats undergo a concentrated Maillard reaction, resulting in a professional-grade finish.
Section B: Prep & Timing Fault-Lines:
The most common human error is rushing the second proof. If the loaf enters the oven under-proofed, the "oven spring" will be too violent, causing the Braided Challah Skin to tear at the seams. This creates white, unsightly gaps in your braid. Conversely, over-proofing leads to a "deflated tire" aesthetic. Use the "finger-dent test": press the dough lightly; if it springs back slowly and leaves a small indentation, it is ready for the thermal phase.
THE VISUAL SPECTRUM
Section C: Thermal & Visual Troubleshooting:
Look at the Masterclass photo. Note the deep, mahogany saturation and the way the light reflects off the ridges. If your loaf is pale, your oven temperature is likely too low or your glaze lacked sufficient protein. If the top is burning while the center is raw, tent the loaf with foil. A "dull" skin usually indicates a lack of humidity in the first 10 minutes of baking. For a truly professional sheen, use a pastry brush with natural bristles to avoid leaving streak marks in the glaze. The goal is a uniform, glass-like finish that looks almost lacquered.
THE DEEP DIVE
Macro Nutrition Profile:
A standard slice of this Challah contains approximately 220 calories, 6g of protein, 34g of carbohydrates, and 7g of fat. The high egg content provides a significant boost in Vitamin D and Choline compared to standard white breads.
Dietary Swaps:
For a Vegan version, substitute honey with agave nectar and use "aquafaba" (chickpea liquid) mixed with a dash of turmeric for the glaze. For Gluten-Free requirements, use a high-quality 1-to-1 flour blend containing xanthan gum, though the braiding tension will be significantly harder to maintain without traditional gluten. Keto versions require almond flour and vital wheat gluten, though the texture will be denser and less "cloud-like."
Meal Prep & Reheating Science:
To maintain the molecular structure, store the loaf in a paper bag for the first 24 hours. For long-term storage, slice and freeze. To reheat, use a toaster oven at 350F for 3 minutes. This re-crystallizes the starches and restores the "snap" to the Braided Challah Skin without drying out the interior.
THE KITCHEN TABLE
Why is my challah skin dull instead of shiny?
You likely only applied one coat of egg wash. The "Double-Glaze Protocol" is essential. Apply once after braiding and again right before the oven to build a thick, reflective protein layer that captures the light.
Can I use butter instead of oil?
While butter adds a piquant richness, oil is traditional for Kosher "Pareve" status. Oil also results in a softer, more flexible crumb that stays fresh longer than butter-based breads, which tend to firm up quickly when cooled.
How do I prevent the bottom from burning?
High sugar and egg content make the bottom susceptible to scorching. Use a heavy-duty, light-colored aluminum baking sheet. If your oven runs hot, stack two baking sheets together to create an insulating air gap that protects the base.
My braid is splitting at the sides. What happened?
This is a "tension blowout." It occurs when the exterior sets before the interior has finished expanding. Ensure your oven is not too hot and consider adding a small pan of water to the oven floor to provide initial steam.

