
Listen up, kitchen architects. We are moving beyond the realm of mere sustenance and into the territory of high-stakes lipid engineering. The subject of today's audit is the Skillet Sausage Bake; a masterclass in thermal conductivity and the strategic management of animal fats. This is not a "one-pan wonder" for the faint of heart. It is a calculated orchestration of the Maillard reaction, designed to transform humble links and fibrous vegetables into a cohesive, caramelized infrastructure of flavor. When you drop those sausages into a preheated cast iron vessel, you are initiating a complex sequence of protein denaturation and moisture expulsion. The goal is a high-contrast texture profile: a snap-tight casing that yields to a succulent, emulsified interior, all while the surrounding aromatics bathe in the rendered gold of the pan. If your kitchen does not currently smell like a high-end bistro during a mid-shift rush, you are doing it wrong. We are here to fix your workflow, optimize your heat distribution, and ensure your Skillet Sausage Bake achieves peak structural integrity.
THE DATA MATRIX
| Metric | Specification |
|---|---|
| Prep Time | 20 Minutes |
| Execution Time | 35 Minutes |
| Yield | 4 Servings |
| Complexity (1-10) | 4 |
| Estimated Cost per Serving | $3.50 – $4.25 |
THE GATHERS
Ingredient Protocol:
- 680g / 1.5 lbs High-Quality Italian Sausages (Links)
- 450g / 1 lb Red Bliss Potatoes (Quartered)
- 240ml / 1 cup Bell Peppers (Tri-color, sliced)
- 120ml / 0.5 cup Red Onion (Large wedges)
- 30ml / 2 tbsp Extra Virgin Olive Oil
- 15ml / 1 tbsp Fresh Rosemary (Minced)
- 5g / 1 tsp Smoked Paprika
- 3g / 0.5 tsp Flaked Sea Salt
- 2g / 0.25 tsp Fresh Cracked Black Pepper
Section A: Ingredient Quality Audit:
The most common point of failure in a Skillet Sausage Bake is the moisture content of the protein. Sub-par, mass-produced sausages often contain excessive fillers and water. During the thermal phase, this water leaches out, steaming the meat instead of searing it. To fix this, always source sausages from a butcher who uses a natural casing. If your links feel "spongy," pat them dry with a lint-free towel and allow them to air-dry in the refrigerator for one hour before cooking. This encourages a pellicle to form, ensuring a superior snap. For the potatoes, if they are too starchy (like a Russet), they will crumble and turn into a viscous paste. Stick to waxy varieties like Red Bliss or Yukon Gold to maintain structural definition under high heat.
THE MASTERCLASS
1. Thermal Priming and Mise en Place
Begin by preheating your oven to 218C / 425F. While the ambient air stabilizes, use a digital scale to measure your ingredients with precision. Wash and dry your produce thoroughly; any residual surface moisture will sabotage the roasting process by creating a steam barrier. Use a sharp chef knife to ensure uniform cuts.
Pro Tip: Uniformity is the soul of even cooking. Use a bench scraper to efficiently transfer your prepped aromatics from the cutting board to your mixing bowl without losing the smaller, flavor-dense fragments.
2. The Initial Render
Place your cast iron skillet over medium-high heat on the stovetop. Add a splash of oil and sear the sausages for 2 minutes per side. You are not looking for a full cook here; you are looking to render the initial layer of fat and establish a base layer of flavor in the pan.
Pro Tip: This step utilizes conduction to kickstart the Maillard reaction. By searing first, you ensure the casings do not remain pale and rubbery once they enter the convective environment of the oven.
3. Emulsifying the Aromatics
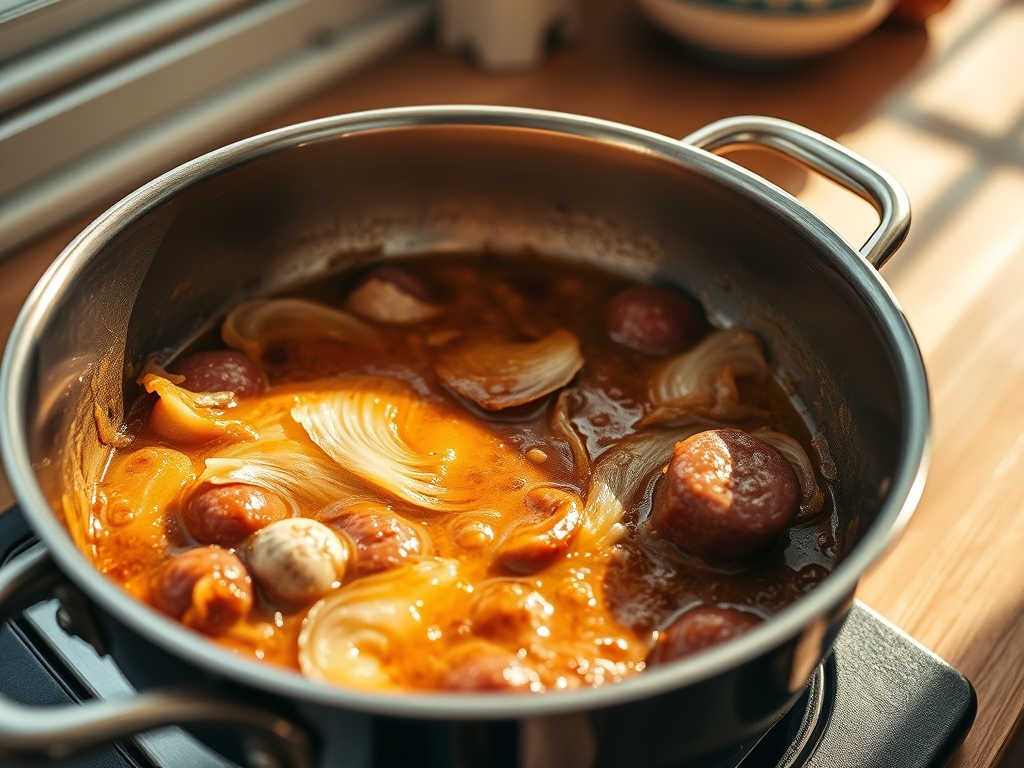
Remove the sausages and set them aside on a resting rack. Toss your potatoes, peppers, and onions directly into the hot fat remaining in the skillet. Use a saucier or a sturdy wooden spoon to scrape the bottom of the pan, loosening the fond (the browned bits). Add your rosemary and paprika now.
Pro Tip: The fat acts as a delivery system for fat-soluble compounds in the spices. By tossing the vegetables in the hot rendered sausage fat, you infuse every surface with a deep, savory profile that oil alone cannot provide.
4. The Structural Assembly
Nestle the partially seared sausages back into the bed of vegetables. Ensure that no two sausages are touching; they need airflow to crisp properly. Transfer the entire skillet to the center rack of your oven.
Pro Tip: Airflow is critical. If the pan is overcrowded, the vegetables will release moisture that cannot escape, leading to a soggy texture. If necessary, split the batch between two skillets to maintain the integrity of the roast.
5. The Final Deglaze and Rest
Once the internal temperature of the sausages reaches 71C / 160F, remove the skillet. If the pan looks dry, add a tablespoon of balsamic vinegar or white wine to deglaze the surface, creating a light, piquant pan sauce that coats the ingredients as you toss them one last time.
Pro Tip: Allow the dish to rest for five minutes before serving. This allows the internal juices to redistribute within the meat fibers, ensuring that the first bite is succulent rather than a dry disappointment.
Section B: Prep & Timing Fault-Lines:
The most frequent human error is the "Cold Start." Never place a cold skillet into a cold oven. This leads to uneven cooking where the exterior of the sausage overcooks before the center of the potato reaches a palatable texture. Another timing trap is the "Aromatic Burn." If you add minced garlic or delicate herbs at the very beginning of the stovetop sear, they will carbonize and turn bitter. Always add your delicate aromatics just before the skillet enters the oven to protect their volatile oils.
THE VISUAL SPECTRUM
Section C: Thermal & Visual Troubleshooting:
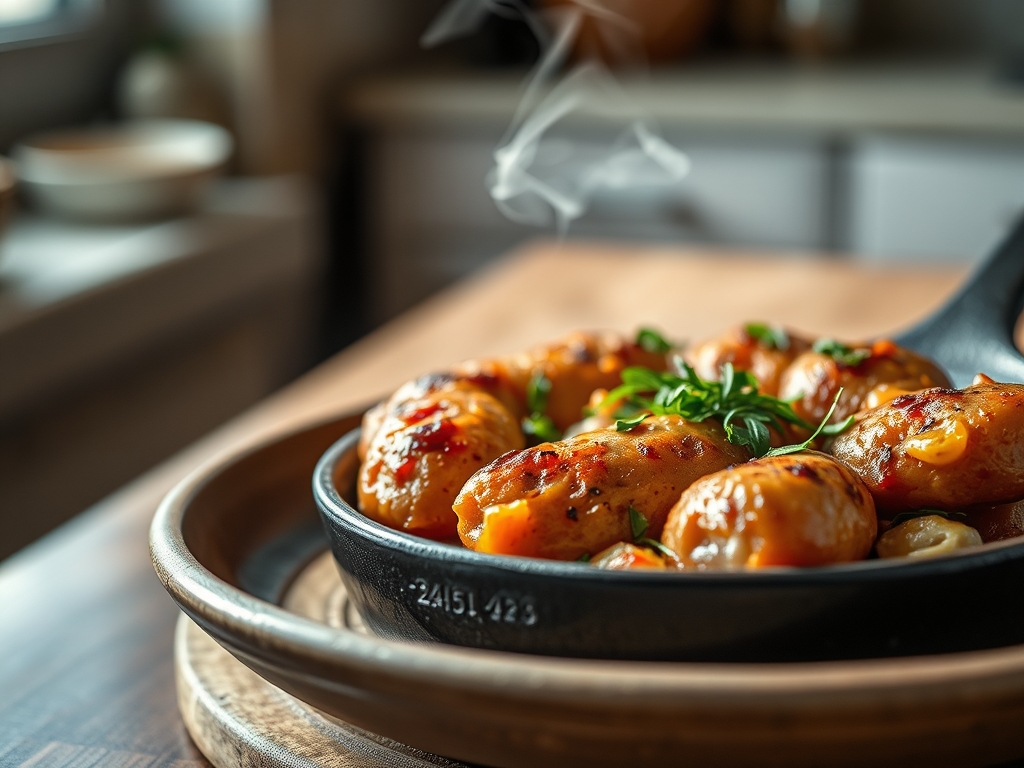
Referencing the Masterclass photo, look for the "Char-Kissed" highlights on the onion edges and the deep mahogany hue of the sausage skins. If your bake looks pale or "washed out," your oven calibration may be low; use an independent oven thermometer to verify. If the vegetables are dark but the potatoes are still firm, your knife work was likely inconsistent. Smaller potato chunks are required for a 35-minute window. If the sausages have burst their casings, you applied heat too aggressively; next time, prick the casings once or twice with a thin needle to allow for controlled steam expansion.
THE DEEP DIVE
Macro Nutrition Profile
Per serving, this Skillet Sausage Bake delivers approximately 35g of protein, 28g of healthy lipids (depending on sausage choice), and 22g of complex carbohydrates. It is a high-density fuel source designed for recovery and sustained energy.
Dietary Swaps
- Vegan: Utilize high-protein seitan-based sausages and increase the olive oil volume to compensate for the lack of animal fat rendering.
- Keto: Replace the potatoes with cauliflower florets or radishes. Radishes, when roasted, lose their peppery bite and take on a texture strikingly similar to potatoes.
- GF: Ensure your sausages are certified gluten-free, as many commercial brands use breadcrumbs as a binder.
Meal Prep & Reheating Science
To maintain molecular structure during reheating, avoid the microwave. The microwave agitates water molecules, which turns the potato starch into a rubbery mess and toughens the protein. Instead, reheat in a 175C / 350F oven for 10 minutes. This preserves the crispness of the casing and prevents the lipids from separating and becoming greasy.
THE KITCHEN TABLE
Why are my potatoes always crunchy?
You likely cut them too large or didn't toss them thoroughly in fat. Small, uniform cubes ensure the heat penetrates the starch centers at the same rate the sausage reaches safety temperatures.
Can I use chicken sausage instead?
Yes, but chicken is leaner. You must increase your olive oil by 15ml to ensure there is enough liquid fat to properly roast the vegetables and prevent the meat from drying out.
How do I get more "snap" in the casing?
Ensure the sausages are dry before they hit the pan. Moisture is the enemy of the snap. A quick stovetop sear before the oven roast is the non-negotiable secret to that professional texture.
My vegetables are soggy, what happened?
The pan was overcrowded. When vegetables are packed too tightly, they steam in their own juices. Use a larger skillet or reduce the quantity to allow for proper steam evaporation and browning.

