
Stop listening to the siren song of tight, uniform crumbs and start worshipping at the altar of the cavernous void. We are not just baking bread; we are engineering a structural masterpiece of high-hydration dough that defies gravity. To master the architecture of large-pore rustic breads, you must first confront the Ciabatta Crust Data. This is the biometric signature of a perfect bake: a glass-shattering exterior that yields to a crumb so aerated it feels like eating a cloud trapped in a honeycomb. This is the 80 percent hydration threshold where the gluten network is pushed to its absolute breaking point. If your crust lacks that specific mahogany sheen or if your crumb looks like a dense sponge, you are failing the audit. We are looking for a viscous dough that behaves more like a liquid than a solid. We are looking for the thermal shock that turns steam into structural integrity. Prepare to get your hands messy as we dissect the molecular mechanics of the ultimate rustic loaf.
THE DATA MATRIX
| Metric | Specification |
|---|---|
| Prep Time | 45 Minutes (Active) |
| Execution Time | 18 – 22 Hours (Fermentation Included) |
| Yield | 2 Large Loaves |
| Complexity | 8 / 10 |
| Estimated Cost per Serving | $0.45 |
THE GATHERS
Ingredient Protocol:
- 500g / 4 cups Bread Flour (Minimum 12.5% Protein)
- 400ml / 1.75 cups Filtered Water (Room Temperature)
- 10g / 2 tsp Fine Sea Salt
- 3g / 1 tsp Instant Yeast
- 20ml / 1.5 tbsp Extra Virgin Olive Oil
Section A: Ingredient Quality Audit:
If your flour lacks the requisite protein content, your gluten network will collapse under the weight of the water. This results in a "pancake" loaf rather than a vaulted ceiling. Technical Fix: If using All-Purpose flour, supplement with 15g of Vital Wheat Gluten to reinforce the structural walls. If your water is heavily chlorinated, it will inhibit yeast activity. Technical Fix: Use filtered water or let tap water sit uncovered for 24 hours to allow the chlorine to dissipate. Low-quality olive oil can turn acrid under high heat; ensure you use a cold-pressed oil to infuse the crust with a grassy, peppery finish without compromising the Ciabatta Crust Data profile.
THE MASTERCLASS
1. The Autolyse Phase
Combine your flour and water in a large ceramic bowl until no dry streaks remain. Let this shaggy mass rest for 40 minutes. This allows the flour to fully hydrate and enzymes to begin breaking down starches into sugars.
Pro Tip: Use a digital scale for this. Volumetric measurements are the enemy of consistency in high-hydration baking. The science here involves the natural development of gluten without physical labor; the water molecules begin to align the protein strands automatically.
2. The Salt and Yeast Integration
Sprinkle your salt and yeast over the hydrated dough. Add the olive oil. Use the "pincer method" to squeeze the ingredients into the dough until fully incorporated. The dough will feel viscous and unmanageable; do not add more flour.
Pro Tip: Use a bench scraper to keep your work surface clean. The salt strengthens the gluten bonds while the oil acts as a lubricant, allowing the dough to expand significantly during the final proof without tearing the delicate surface tension.
3. The Coil Fold Sequence
Instead of traditional kneading, perform four sets of "coil folds" every 30 minutes. Wet your hands, lift the dough from the middle, and let it fold under itself. This builds vertical strength in a horizontal medium.
Pro Tip: This technique uses gravity to stretch the gluten. By folding the dough over itself, you are creating layers of air pockets. This is the secret to the large-pore architecture seen in the Ciabatta Crust Data images.
4. Cold Bulk Fermentation
Transfer the dough to a transparent, oiled container. Place it in the refrigerator for 12 to 16 hours. This slow fermentation allows for complex flavor development and makes the high-hydration dough easier to handle.
Pro Tip: Cold temperatures slow down yeast respiration but allow lactic acid bacteria to flourish. This creates a piquant tang and ensures the sugars are available for the Maillard reaction during the bake.
5. Shaping and Final Proof
Gently tip the dough onto a heavily floured surface. Do not degas. Use your bench scraper to cut the dough into rectangles. Transfer to a floured linen couche for a final 90-minute rest.
Pro Tip: Handle the dough like it is a water balloon. Any rough movement will collapse the internal chambers you have spent 18 hours building. The flour on the exterior provides the rustic, dusty aesthetic characteristic of artisan loaves.
6. The High-Heat Execution
Preheat a baking stone or heavy steel at 500 degrees Fahrenheit. Slide the loaves onto the stone and immediately introduce steam by pouring hot water into a preheated saucier or cast iron pan at the bottom of the oven.
Pro Tip: Steam is the catalyst for oven spring. It keeps the surface of the dough supple, allowing it to expand fully before the heat sets the crust. Without steam, your loaf will be stunted and the crust will be dull.
Section B: Prep & Timing Fault-Lines:
The most common human error is rushing the fermentation. If the dough has not doubled in size and shows visible bubbles on the surface, the internal structure is not ready. Technical Fix: Use a clear container and mark the starting height with a rubber band. If your kitchen is below 68 degrees Fahrenheit, use an oven with the light turned on as a makeshift proofing box to maintain a consistent 75 degree environment.
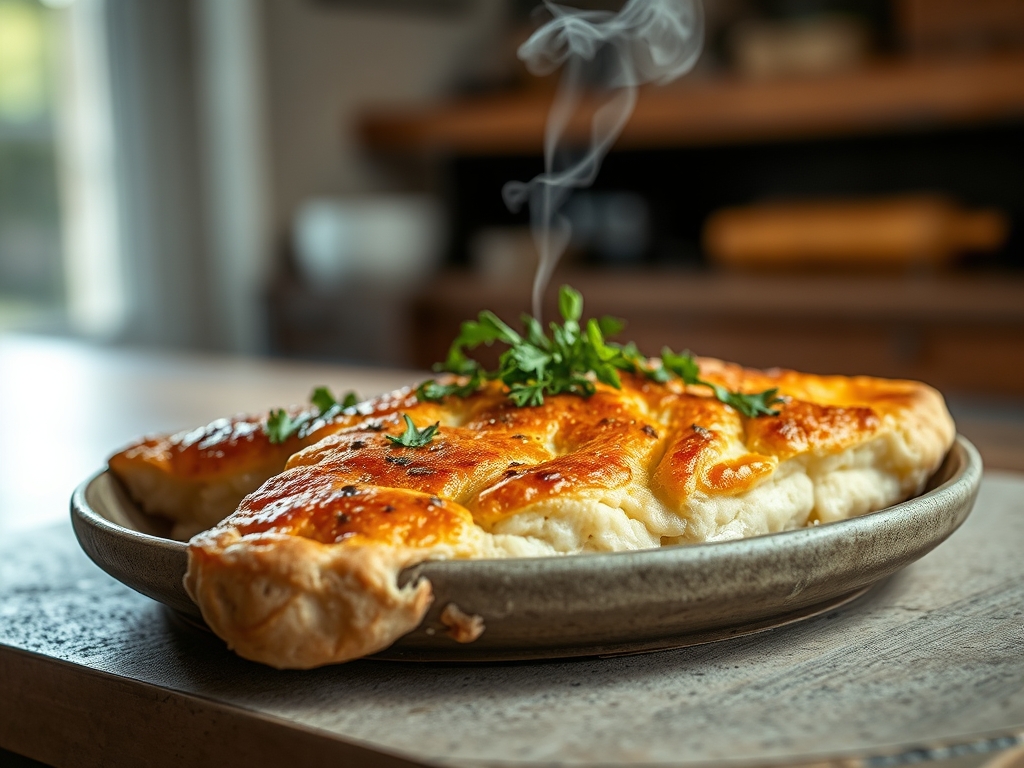
THE VISUAL SPECTRUM
Section C: Thermal & Visual Troubleshooting:
Referencing the Masterclass photo, your loaf should exhibit a "sharded" appearance. If the crust is uniform and smooth, you likely under-hydrated the dough or failed to create enough steam. If the bottom is burnt while the top is pale, your baking stone is too close to the heating element; move it to the middle rack. A dull, matte finish indicates that the starches did not gelatinize properly. Technical Fix: Ensure the oven is fully preheated for at least 60 minutes before the dough enters. The deep mahogany color in the photo is the result of the Maillard reaction; if your bread is white, you pulled it too early. Aim for a "bold bake" where the edges are almost charred.
THE DEEP DIVE
Macro Nutrition Profile:
A single serving (approx. 100g) contains roughly 240 calories, 8g of protein, 48g of carbohydrates, and 2g of fat. While high in carbs, the long fermentation process lowers the glycemic index compared to commercial white bread.
Dietary Swaps:
- Vegan: Naturally vegan. Ensure your flour is unbleached.
- Keto: This architecture relies on gluten and starch; there is no keto equivalent that achieves these specific large pores.
- GF: Use a high-quality gluten-free bread flour blend with added psyllium husk to mimic the viscous elasticity of wheat dough.
Meal Prep & Reheating Science:
To maintain the molecular structure, never refrigerate baked bread; this accelerates staling through starch retrogradation. Store at room temperature in a paper bag for 48 hours. To revive the "glass" crust, mist the loaf with water and bake at 350 degrees Fahrenheit for 8 minutes. This re-hydrates the starch molecules and restores the crisp exterior.
THE KITCHEN TABLE
Why is my ciabatta flat?
It usually stems from weak gluten or over-proofing. If the dough sits too long, the yeast exhausts its fuel and the structural walls collapse. Ensure you are using high-protein flour and performing all scheduled coil folds to build strength.
Can I use a stand mixer?
You can, but be careful. High-hydration doughs can easily over-heat in a mixer. Use the lowest speed and finish with hand folds to ensure you are not shearing the gluten strands you worked so hard to aerate.
What if I don't have a baking stone?
An inverted heavy baking sheet will work in a pinch. However, it lacks the thermal mass of a stone or steel. Expect a slightly less dramatic oven spring and a softer bottom crust.
Is the olive oil mandatory?
The oil provides extensibility and helps the crust render a beautiful golden hue. While you can omit it for a leaner dough, the crumb will be slightly tougher and the crust less shatter-crisp.

