
Forget the pillowy, bleached-out imposters found in the supermarket aisles. We are here to discuss the heavy artillery of the bakery world. Dark Rye Bread is not just a loaf; it is a structural masterpiece of pentosan-rich architecture and deep carbonization. To master this loaf is to understand the physics of moisture retention and the chemistry of acidic fermentation. When you slice into a genuine artisan rye, you are greeted by a crumb that is dense, moist, and aromatically complex. It smells of damp earth, fermented grain, and the bitter kiss of molasses. The crust should be a fortress; a dark, caramelized barrier that crackles under the pressure of a serrated blade. We are looking for a specific structural integrity that defies the standard gluten-reliant models of wheat baking. This is a game of enzyme management and pH control. If you are looking for light and airy, go bake a brioche. If you want a loaf that can survive a trek across the tundra and still taste like a triumph of human civilization, you are in the right place.
THE DATA MATRIX
| Metric | Specification |
|---|---|
| Prep Time | 45 Minutes (Active) |
| Execution Time | 18 to 24 Hours (Fermentation Included) |
| Yield | 2 Large Boules |
| Complexity | 8 / 10 |
| Estimated Cost per Serving | $0.65 USD |
THE GATHERS
Ingredient Protocol:
- 500g / 4 cups Dark Rye Flour (Organic, stone-ground preferred)
- 300g / 2.5 cups Bread Flour (High protein content)
- 200g / 0.75 cup Active Rye Sourdough Starter
- 550ml / 2.25 cups Filtered Water (Heated to 32C / 90F)
- 15g / 2.5 tsp Sea Salt
- 60ml / 4 tbsp Blackstrap Molasses
- 10g / 2 tsp Caraway Seeds (Whole)
- 5g / 1 tsp Cocoa Powder (Unsweetened, for pigment depth)
Section A: Ingredient Quality Audit:
The primary failure point in Dark Rye Bread is the use of stale flour. Rye contains high levels of oils that can go rancid; if your flour smells like old crayons, your bread will taste like a basement. Ensure your rye flour is fresh and stone-ground to preserve the germ. If your sourdough starter lacks activity, the loaf will fail to aerate, resulting in a literal brick. Test your starter by dropping a teaspoon into water; if it does not float, it is not ready for the heavy lifting required here. If your molasses is too sulfurous, it can inhibit yeast activity. Always opt for unsulphured varieties to maintain a clean fermentation curve.
THE MASTERCLASS
Step-by-Step Execution:
1. The Acidic Foundation
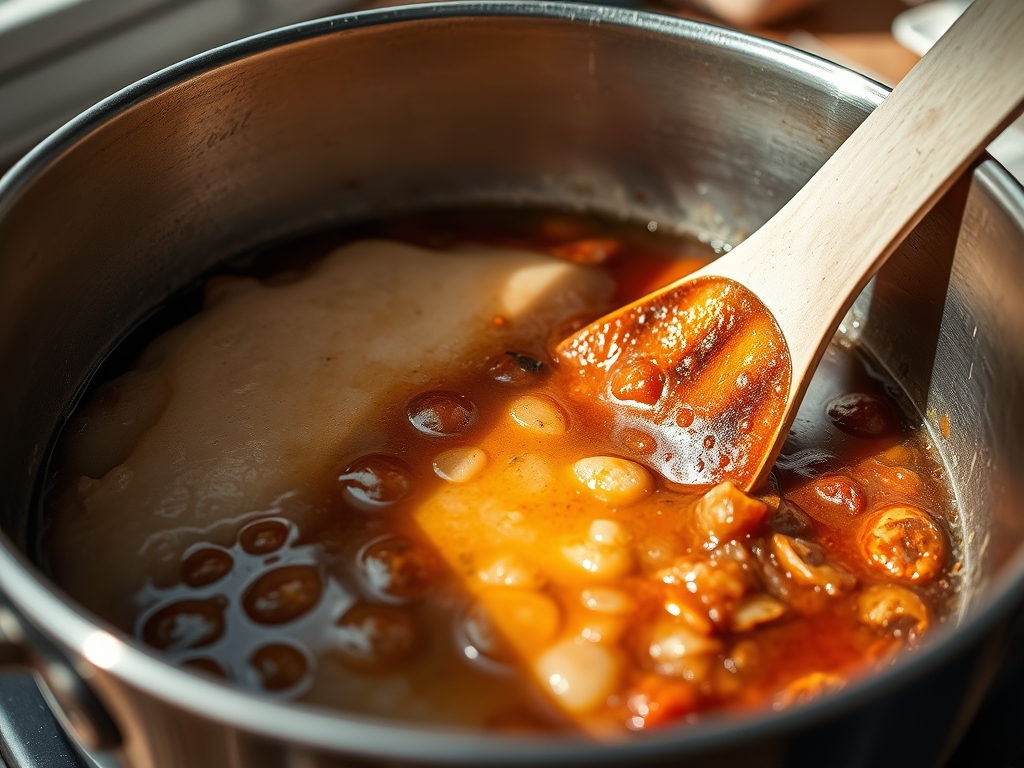
Begin by combining your active rye starter with the warm water and molasses in a large glass bowl. Use a digital scale for every measurement; volumetric guessing is the enemy of consistency. Whisk until the molasses is fully dissolved and the mixture is frothy.
Pro Tip: The molasses does more than add color; it provides simple sugars that jumpstart the yeast while the acidity of the starter begins to break down the complex pentosans in the rye. This prevents the "starch attack" where enzymes turn the dough into a viscous sludge.
2. Dry Component Integration
Sift the dark rye flour, bread flour, cocoa powder, and salt into the wet mixture. Add the caraway seeds. Use a bench scraper to fold the ingredients together until no dry pockets remain. The dough will feel significantly stickier than a standard wheat dough.
Pro Tip: Do not be tempted to add more flour. Rye is naturally sticky due to high levels of pentosan gums. Over-flouring will lead to a dry, crumbly mess rather than a moist, tight crumb.
3. The Bulk Fermentation
Cover the dough and let it rest in a warm, draft-free environment for 4 to 6 hours. Unlike wheat, you are not looking for a massive double in size. You are looking for a slight expansion and a noticeable "puffy" feel when poked.
Pro Tip: Use a saucier filled with hot water placed in the bottom of your oven (turned off) to create a makeshift proofing box. This maintains the 27C (80F) temperature ideal for rye fermentation.
4. Shaping and Final Proof
Turn the dough onto a lightly floured surface. Divide into two equal portions. Use your bench scraper to tension the dough into tight rounds. Place them into well-floured bannetons or bowls lined with linen. Let them proof for another 2 hours or overnight in the refrigerator.
Pro Tip: Cold proofing (retardation) allows the lactic acid bacteria to produce more complex flavor compounds, giving the bread its signature piquant tang.
5. The Carbonization Phase
Preheat a Dutch oven at 250C (480F) for at least 45 minutes. Carefully score the top of the loaf with a sharp blade. Drop the loaf into the pot, spray with a mist of water, and cover. Bake for 20 minutes covered, then reduce heat to 220C (425F) and bake for another 25 minutes uncovered.
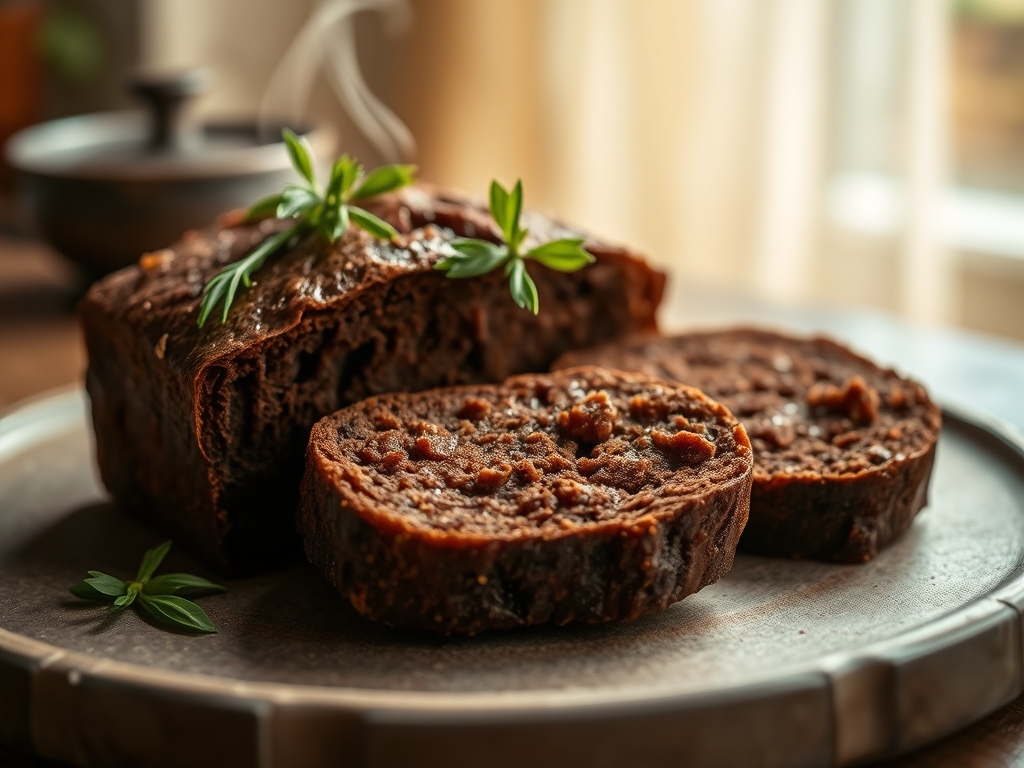
Pro Tip: The steam trapped in the Dutch oven allows the crust to expand before the Maillard reaction sets the exterior. This creates that professional, rugged aesthetic seen in the audit photo.
Section B: Prep & Timing Fault-Lines:
Timing is the most volatile variable. If you over-proof rye, the structure will collapse because the gluten network is weaker than in wheat. If your kitchen is too cold, the fermentation will stall. Use a digital probe thermometer to check the internal temperature of the dough; it should ideally hover around 26C. If the dough has not risen in 6 hours, move it to a warmer spot immediately. Do not rush the cooling process. Rye bread requires at least 12 hours of cooling to "set" the crumb. Cutting it too early will result in a gummy, unappealing texture.
THE VISUAL SPECTRUM
Section C: Thermal & Visual Troubleshooting:
Look at the Masterclass photo. Notice the deep, mahogany hue and the sharp, defined edges of the scoring marks. If your loaf is pale, your oven temperature was likely too low or your molasses was diluted. If the crust is excessively hard but the inside is raw, your oven was too hot; use an oven thermometer to verify the calibration. If the loaf is flat and wide, you likely over-hydrated the dough or over-proofed it, causing the structural "fortress" to fail. A perfect Dark Rye Bread should sound hollow when tapped on the bottom, indicating that the internal moisture has been properly managed.
THE DEEP DIVE
Macro Nutrition Profile:
A single slice (approx. 50g) provides roughly 120 calories, 4g of protein, 25g of carbohydrates, and 5g of dietary fiber. It is significantly higher in minerals like magnesium and zinc compared to white bread.
Dietary Swaps:
- Vegan: This recipe is inherently vegan.
- Keto: Replace rye flour with a mix of flax meal and vital wheat gluten, though the flavor profile will shift significantly.
- GF: Use a certified gluten-free flour blend with xanthan gum, though the "crusty" results will be harder to achieve without the bread flour component.
Meal Prep & Reheating Science:
To maintain molecular structure, store the loaf in a paper bag at room temperature for up to 5 days. Never refrigerate; this accelerates starch retrogradation and makes the bread stale. To reheat, toast slices to infuse them with crispness or wrap the whole loaf in foil and bake at 150C for 10 minutes to render the crust pliable again.
THE KITCHEN TABLE
Why is my rye bread so heavy?
Rye lacks the gluten-forming proteins found in wheat. It relies on pentosans for structure, which naturally create a denser, more compact crumb. If it is "brick-like," your starter was likely inactive or the proofing time was insufficient.
Can I bake this without a Dutch oven?
Yes, but you must manually create steam. Place a shallow pan of boiling water on the bottom rack of your oven during the first 15 minutes of baking to ensure the crust does not set too quickly.
What causes the bitter aftertaste?
A slight bitterness is expected from the molasses and cocoa. However, if it is overwhelming, you may have over-fermented the dough, allowing the acetic acid to dominate the flavor profile. Monitor your fermentation times more closely.
How do I get a shinier crust?
Brush the top of the loaf with a cornstarch slurry (1 tsp cornstarch boiled with 1/2 cup water) immediately after taking it out of the oven. This creates a professional, translucent sheen that highlights the dark color.

