
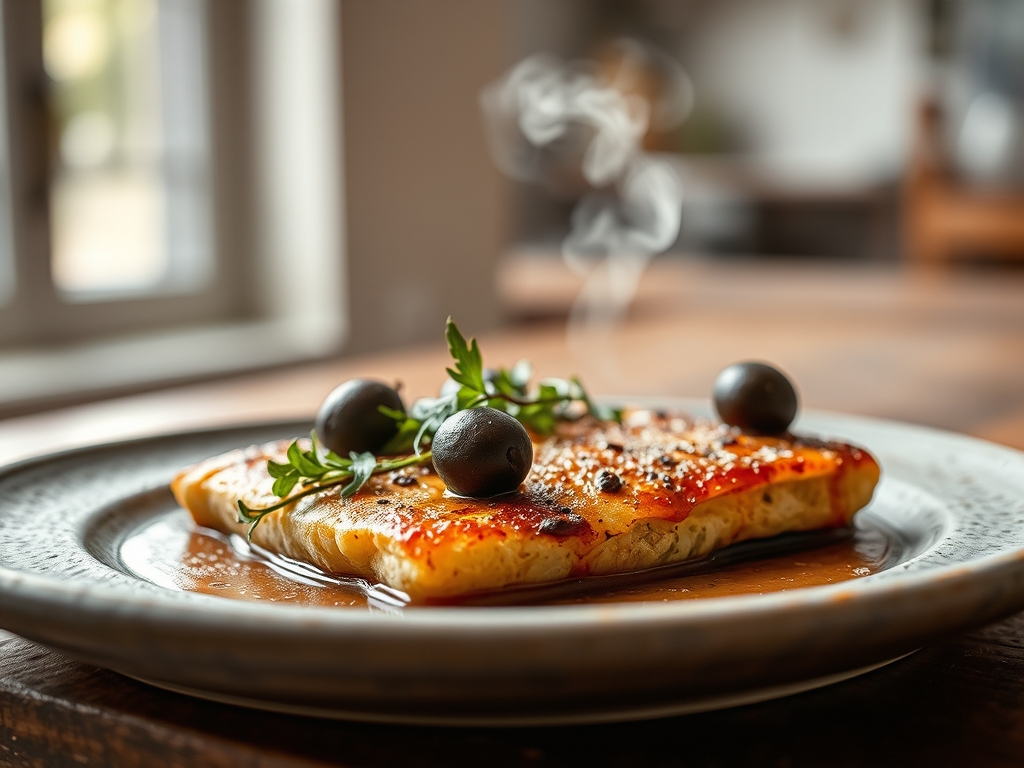
Stop scrolling and listen to the symphony of a high-hydration dough meeting a screaming-hot oven. We are not just baking bread; we are engineering a structural masterpiece of dimpled lipid pockets and structural integrity. The goal is the elusive Olive Focaccia Char. This is that specific, blackened blister on the crust that signifies a perfect marriage of high-quality lipids and intense thermal radiation. When you press your thumb into the pillowy surface, the dough should spring back with a defiant resilience while the oil sizzles in the craters. We are looking for a crumb that is light enough to float but rich enough to stain your fingers with the golden essence of the Mediterranean. This is culinary infrastructure at its finest. Forget those dry, bready slabs sold at the supermarket. We are aiming for a viscous interior and a piquant, salty exterior that shatters upon impact. If you are ready to audit your kitchen standards and elevate your fermentation game to professional levels, let us begin the assembly.
THE DATA MATRIX
| Metric | Specification |
|---|---|
| Prep Time | 20 Minutes (Active) / 18 Hours (Fermentation) |
| Execution Time | 25 Minutes |
| Yield | 1 Full Sheet Pan (12-15 Servings) |
| Complexity (1-10) | 6 |
| Estimated Cost per Serving | $0.85 |
THE GATHERS
Ingredient Protocol:
- 500g / 4 cups Bread Flour (High Protein Content)
- 400ml / 1.75 cups Filtered Water (Room Temperature)
- 10g / 2 tsp Fine Sea Salt
- 5g / 1.5 tsp Instant Yeast
- 100ml / 0.5 cup Extra Virgin Olive Oil (Divided)
- 150g / 1 cup Pitted Kalamata or Castelvetrano Olives (Halved)
- 10g / 2 tbsp Fresh Rosemary Sprigs
- 5g / 1 tsp Flaky Finishing Salt
Section A: Ingredient Quality Audit:
The most common failure in focaccia infrastructure is the use of "dead" flour. If your flour has been sitting in a humid pantry for six months, its protein chains are compromised. This leads to a flat, dense slab rather than an aerated masterpiece. Always check the "best by" date and store flour in airtight containers. If your yeast fails to bloom, the water was likely too hot, killing the microorganisms, or too cold, keeping them dormant. Use a digital thermometer to ensure your water is exactly 95 degrees Fahrenheit. Lastly, do not use "light" olive oil. You need the polyphenols in extra virgin olive oil to achieve the proper Olive Focaccia Char. Low-quality oils have a lower smoke point and will taste acrid rather than fruity after the bake.
THE MASTERCLASS
1. The Initial Hydration Phase
In a large glass bowl, combine your flour, yeast, and salt. Gradually pour in the water while using a bench scraper or a stiff spatula to incorporate the ingredients until no dry streaks remain. The dough will be incredibly sticky; do not be tempted to add more flour.
Pro Tip: This is a high-hydration dough (80 percent). High water content is essential to aerate the crumb during the bake, as the water turns to steam and expands the gluten pockets.
2. The Stretch and Fold Sequence
Instead of traditional kneading, use the stretch and fold method. Wet your hands to prevent sticking. Reach under one side of the dough, pull it upward, and fold it over the center. Rotate the bowl and repeat four times. Perform this sequence every 30 minutes for two hours.
Pro Tip: This technique builds gluten strength without degassing the dough. Using a digital scale to track your ingredient ratios ensures that the protein-to-water balance is perfect for structural stability.
3. The Cold Fermentation Audit
Cover the bowl tightly with plastic wrap and refrigerate for 12 to 18 hours. This slow fermentation allows the yeast to produce complex esters and acids, resulting in a superior flavor profile and a more digestible crumb.
Pro Tip: Cold fermentation slows down yeast activity, which allows for smaller, more uniform gas bubbles. This creates the "dimpled" texture rather than large, irregular holes.
4. The Dimpling and Infusion
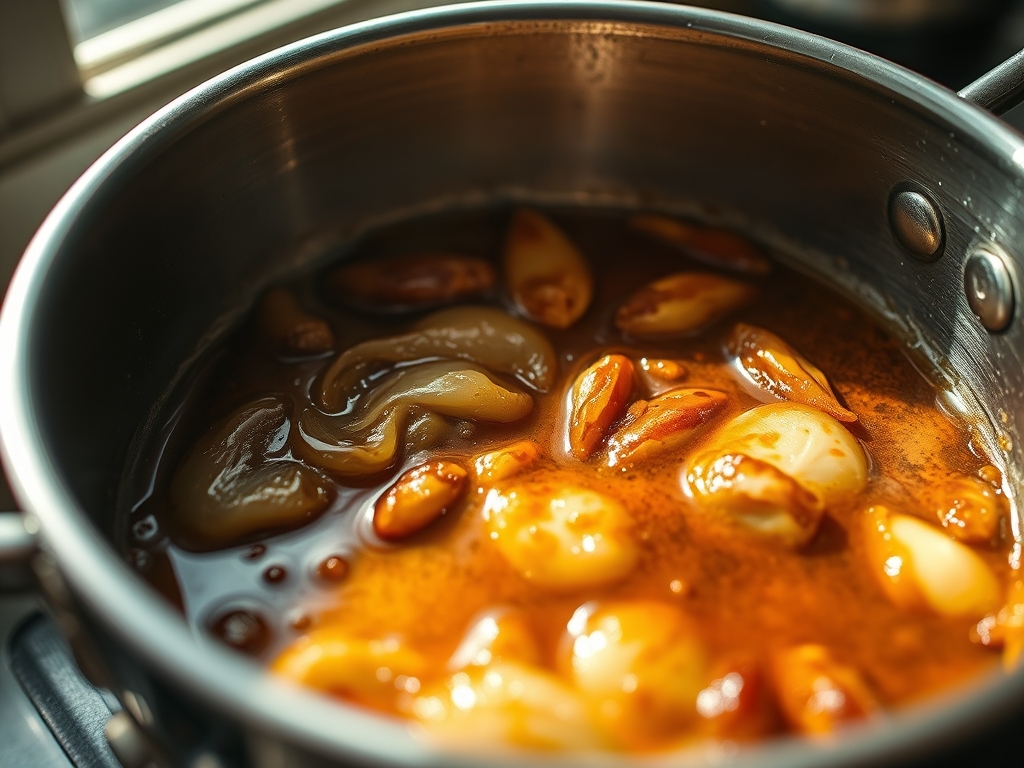
Pour 50ml of olive oil into a heavy-duty rimmed baking sheet. Transfer the cold dough to the pan. Let it rest for 2 hours until it reaches room temperature and fills the corners. Press your fingers deep into the dough to create craters. Insert the olives and rosemary into these pockets and drizzle with the remaining oil.
Pro Tip: Use a saucier to slightly warm your olive oil with the rosemary before drizzling. This helps to infuse the fat with herbal aromatics before it even hits the oven.
5. The Thermal Execution
Preheat your oven to 450 degrees Fahrenheit. Place the pan on the center rack. Bake for 20 to 25 minutes until the top is a deep golden brown with visible patches of Olive Focaccia Char.
Pro Tip: For an even better crust, place a baking stone or heavy steel on the bottom rack during preheating. This creates a heat reservoir that ensures the bottom of the bread "fries" in the olive oil.
Section B: Prep & Timing Fault-Lines:
Timing is the silent killer of great bread. If you rush the room-temperature rise after the cold ferment, the dough will be too cold to expand, resulting in a gummy "lead bar" texture. Conversely, over-proofing in a hot kitchen will cause the gluten structure to collapse, leaving you with a flat pancake. Use your finger to poke the dough; if it springs back slowly and leaves a slight indentation, it is ready. If it snaps back instantly, it needs more time. If it deflates, you have waited too long.
THE VISUAL SPECTRUM
Section C: Thermal & Visual Troubleshooting:
Look closely at the reference image. You should see a variegated topography of gold, amber, and dark mahogany. If your focaccia is a uniform, pale tan, your oven temperature was likely too low or your rack position was too high. To fix this, move the pan to the bottom third of the oven for the last five minutes of baking. If the olives are shriveled and burnt, you did not press them deep enough into the "lipid pockets." They should be nestled in the dough to stay moist. If the surface looks matte rather than glossy, you were too stingy with the oil. The oil should literally pool in the dimples; this is what creates the render effect on the crust.
THE DEEP DIVE
Macro Nutrition Profile:
A standard serving contains approximately 210 calories, 9g of fat (mostly monounsaturated from the olive oil), 28g of carbohydrates, and 5g of protein. While it is a carbohydrate-dense food, the high-quality fats and slow fermentation process lower the overall glycemic index compared to white sandwich bread.
Dietary Swaps:
- Vegan: This recipe is naturally vegan. Ensure your sugar (if used in the yeast bloom) is bone-char free.
- Keto: Replace bread flour with a blend of almond flour, vital wheat gluten, and xanthan gum. Note that the texture will be significantly denser.
- GF: Use a high-quality 1-to-1 gluten-free baking flour. You will need to add 10g of psyllium husk powder to mimic the gluten elasticity.
Meal Prep & Reheating Science:
To maintain the molecular structure, never microwave focaccia. The microwave agitates water molecules, causing the starch to recrystallize into a rubbery mess. Instead, reheat slices in a 350-degree oven or an air fryer for 3 minutes. This re-crisps the lipid-soaked crust while gently warming the interior.
THE KITCHEN TABLE
Why is my focaccia bottom soggy?
You likely used a thin, non-conductive baking sheet or failed to use enough oil. The bottom of the focaccia should essentially fry in the pan. Use a heavy-duty steel pan and ensure the bottom is fully coated in oil.
Can I use dried rosemary instead of fresh?
You can, but the results are inferior. Dried rosemary can become "woody" and sharp during the high-heat bake. If using dry, soak the herbs in the olive oil for 30 minutes before applying them to the dough to rehydrate the fibers.
My dough didn't rise in the fridge. What happened?
Your refrigerator might be too cold (below 34 degrees Fahrenheit), which completely halts yeast activity. Alternatively, your yeast might be expired. Always perform a "bloom test" with a small amount of warm water and sugar if you are unsure.
How do I get bigger bubbles in the crumb?
Increase the hydration. Try adding an extra 25ml of water to the initial mix. Higher water content creates more steam pressure, which pushes against the gluten walls to create larger, more dramatic internal air pockets during the bake.

